Your headlamp sweeps across a wet treeline and catches nothing but fog. You’re sure you’ve walked 600 meters from the last attack point—but your tally says 480. Somewhere between the mud, the rain, and your gloves, your pace beads crept. Navigation errors routinely rank among the leading factors in backcountry rescues and training busts, and sometimes it’s not the compass that fails—it’s a tiny, sliding detail that steals your accuracy one kilometer at a time.
I’ve taught land nav to soldiers, SAR volunteers, and stubborn solo hikers who prefer map and compass to electronics. I’ve watched beads migrate on frozen cord at -10°F, seize with grit in desert wind, and melt out in July humidity. The fix isn’t expensive or exotic. It’s design discipline: the right cord, the right friction surfaces, and a build you can tune in the field with cold hands.
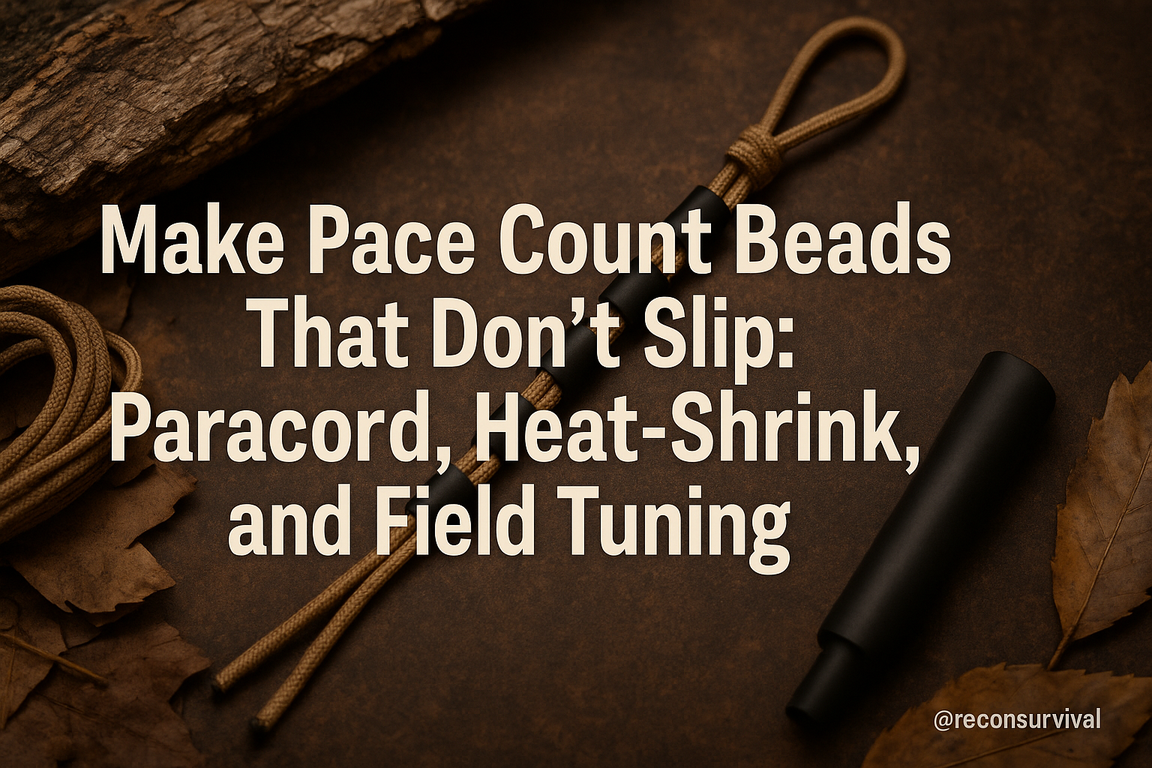
This article is not Land Nav 101. It’s a focused, practical walk-through for making pace count beads that don’t slip—using paracord, heat-shrink, and a few field-proven tweaks. We’ll cover:
- Cord choices that actually grip (why most 550 fails and which microcord wins)
- Heat-shrink sizing and placement to create durable friction “rails”
- Bead alternatives (knots, sleeves, tubing) for zero-rattle, glove-friendly operation
- Pre-stretching, burnishing, and weatherproofing to lock in performance
- Field tuning for your terrain, stride, and season—and quick fixes when conditions change
If preparedness is stewardship, then small tools deserve our best attention—especially the ones that carry you safely home. By the end, you’ll have a low-profile, bombproof set of pace beads tailored to your stride and climate, and the confidence to trust every click. Let’s build a system that earns its keep when it’s dark, wet, and you can’t afford to be 120 meters wrong.
Understanding Pace Count Beads: Failure Modes, Friction, and Why Slip Happens
Understanding Pace Count Beads: Failure Modes, Friction, and Why Slip Happens
A wet night navigation course is a great teacher. You’re 700 meters into a leg, dew on the pines, and every time your ruck bounces, a bead slides down on its own. You know your pace count, but the gear isn’t telling the truth. This section is about why that happens—and how to diagnose it so the fixes we cover next actually stick. Good stewardship includes tuning the little tools that guide big decisions.
Why Beads Slip: The Friction Story
Pace count beads rely on static friction between the cord and bead bore. When static friction is overcome, dynamic friction takes over—and it’s lower. That’s the “one sudden slide” you see during movement. Three variables drive the problem:
– Cord diameter vs. bead bore: If your cord is 2 mm micro-cord and the bead’s inner diameter is 3.5–4 mm, you’ve built a slip machine. Aim for an ID no more than 0.5 mm over cord diameter.
– Surface condition: Nylon’s sheen is slick when new and gets slicker with oils, silicone, sunscreen, and water. Dust can act as a dry lubricant. Matte, lightly textured surfaces grip better.
– Tension and inertia: Slack lanyards whip and “hammer” beads downward. A taut suspension reduces inertia spikes and preserves static friction.
Common Failure Modes
- Glazed sheath: Melted ends and hot knife cuts leave a glossy, low-friction surface. Lightly rough the cord’s bead zone with 600–800 grit to raise the nap.
- Oversized or polished beads: Metal beads with polished bores or plastic with mold-release residue slide easily. Prefer matte acetal/Delrin or unpolished brass with a 2.5–3 mm ID for 2 mm cord, 4–4.5 mm for 550 sheath (3.8–4 mm).
- Wet slippage: Water reduces nylon-on-nylon friction. Add a compressive element (we’ll cover heat-shrink) or select beads with sharper internal edges.
- Cord creep: 550 paracord’s sheath can shift over the core. Pre-stretch 12–18 inches before building to settle fibers.
- Poor anchoring: Loose stopper knots let the whole stack migrate. Use compact, jam-prone knots (double overhand/constrictor) to lock ends.
Quick Diagnostics You Can Run Today
- Wet test: Mist the assembly and jog 100 meters. If beads move without a deliberate pull of 1–2 pounds of force, you need more friction or compression.
- Angle test: Hold the lanyard at 30° and flick. A single bead shouldn’t self-start.
- Grit test: If a wipe with isopropyl alcohol improves grip, you were fighting oils. Degrease before field use.
Key takeaways: slip is a friction mismatch, not a mystery. Start by matching diameters, roughing surfaces, controlling tension, and anchoring knots. Next, we’ll use paracord choices, heat-shrink, and simple field tuning to turn theory into a lanyard that stays honest through rain and miles.
Choosing Materials: Paracord Types, Bead Options, and Heat‑Shrink Sizing That Works
Choosing Materials: Paracord Types, Bead Options, and Heat‑Shrink Sizing That Works
A cold rain, numb fingers, and a night nav leg that just won’t end—this is when sloppy materials show their true colors. If your beads creep or bind, the count becomes guesswork. Good stewardship starts with good choices: pick materials that perform in weather and under wear so you don’t rebuild between missions.
Paracord That Behaves
- Type and fiber: For a full-size, glove-friendly strand, use 550 paracord. Polyester 550 (true 4.0 mm OD) stretches less when wet and resists UV better than nylon—ideal for coastal or rainy zones. Mil‑spec nylon (MIL‑C‑5040H Type III) is fine inland but can lengthen slightly when saturated.
- Gutted vs. ungutted: Ungutted 550 (with inner strands) gives more body for tactile grabs and resists collapse under heat‑shrink collars. If you prefer a slimmer rig, gut the cord to ~3.0 mm OD and compensate with tighter tubing (below).
- Color: High‑vis (orange/reflective tracer) aids night recovery if you drop it; subdued greens/black reduce signature. Choose deliberately for your mission set.
Common mistakes: “Craft cord” that’s polypropylene—slick, compresses unpredictably, and melts early. Verify true 550 and diameter.
Beads That Move When You Tell Them
- Material: Acetal/Delrin barrel beads (8–10 mm long) are quiet, light, and tough in the cold. Brass or stainless add mass (nice hang, but noisy and cold); wood is quiet but can swell when soaked. For salt spray, acetal or titanium are set‑and‑forget.
- Bore size: Match bore slightly larger than cord to slide smoothly but stop reliably at heat‑shrink collars. For 4.0 mm cord, pick 4.5–5.0 mm bores. For gutted ~3.0 mm, 3.5–4.0 mm bores work well.
Troubleshooting: If beads still migrate under jogging, add a thin silicone O‑ring (5 mm ID, 1 mm cross‑section) between bead groups for a subtle brake.
Heat‑Shrink That Locks Without Gluing Solid
- Type: Polyolefin, 3:1 shrink ratio grips better than 2:1. Adhesive‑lined (marine grade) adds a tacky core that resists spin in rain and grit.
- Sizes that work:
- On 4.0 mm 550 (ungutted): 1/4 in (6.4 mm) 3:1 adhesive‑lined, cut into 6–10 mm collars. Shrinks down to ~2.1 mm equivalent, biting into the sheath without crushing.
- On gutted ~3.0 mm: 3/16 in (4.8 mm) 3:1 adhesive‑lined, 6–8 mm lengths.
- Why lengths matter: Short collars (<6 mm) can roll; long collars (>12 mm) reduce bead travel and feel bulky.
Common mistakes: Using 2:1 thin‑wall and wondering why it spins; overheating until the sheath glosses (weakens fibers). Wipe cord with isopropyl before shrinking to improve adhesion; if spin persists, lightly scuff the cord with 400‑grit before applying.
Key takeaway: Choose polyester or true mil‑spec paracord, acetal beads with a bore just over your cord, and 3:1 adhesive‑lined heat‑shrink sized to create firm, low‑profile collars. Build once, trust it in the rain. Next, we’ll prep, cut, and lay out the “rails” so your count feels intuitive in the dark.
Build It Right: Step‑by‑Step Assembly with Measurements, Knots, and Bead Spacing
You’re on a foggy ridgeline, gloves on, rain ticking off your shell. You pull your ranger beads and—click—the last bead stayed put. No slippery surprises, no recount. That reliability starts in the build. Here’s the repeatable, field‑proven assembly that balances friction and ease.
Materials and Why They Matter
- Paracord: 28 inches of gutted 550 (core removed). Gutted cord lays flatter and accepts heat‑shrink better, creating consistent friction.
- Beads: 13 total (9 lower “hundreds,” 4 upper “kilometers”), 8–10 mm OD, 4.5–5 mm bore. Acetal/Delrin or sealed hardwood grip well without swelling. Avoid polished metal; it gets slick.
- Heat‑shrink: Polyolefin, 3:1 ratio, adhesive‑lined preferred. Cut one 4-inch piece (lower run) and one 2-inch piece (upper run).
- Heat source, scissors, ruler, and lighter.
Step‑by‑Step Assembly
1) Tie the attachment loop. At one end, tie a 1-inch bowline (or figure‑8 on a bight if you prefer). This gives a secure hang point for pack straps or compass lanyards.
2) Set the top gate. Measure 1 inch below the loop and tie a snug double overhand (barrel) knot. This is the upper stop so beads never creep under the loop.
3) Install and shrink the upper run sleeve. Slide the 2-inch heat‑shrink against that knot and shrink evenly with a heat gun or the cool edge of a flame, rolling the cord to avoid flat spots. You’re aiming for an OD just under your bead bore so beads move with deliberate pressure.
4) Thread the upper beads (4). Slide them down onto the sleeve. Leave 2–3 mm of exposed sleeve when all four are “down” so you can flick them with gloves.
5) Set the center gate. Tie a triple overhand (fat barrel) knot snug under the upper beads. This hard stop separates the runs.
6) Install and shrink the lower run sleeve. Slide the 4-inch piece against the center gate and shrink as above.
7) Thread the lower beads (9). Again, leave a couple millimeters of exposed sleeve at the bottom for a positive “click.”
8) Finish with a terminal stop. Tie a figure‑8 stopper or diamond knot flush beneath the lower beads. Trim and melt the tag end neatly.
Measurements That Work
- Upper sleeve length: 2 in (fits 4 beads at ~8 mm height each plus working slack).
- Lower sleeve length: 4 in (fits 9 beads with slack).
- Knot spacing: Keep knots snug to sleeves; gaps create rattle and lost friction.
Troubleshooting and Common Mistakes
- Beads creep upward: Add a second, shorter layer of heat‑shrink over the existing sleeve near the top of each run, or swap to adhesive‑lined tubing. Ensure knots are large and compact.
- Beads too tight: Lightly ream bead bores with a 5 mm bit by hand, or warm the sleeve and roll between fingers to relax it. A micro dab of wax helps—use sparingly to avoid future creep.
- Lumpy shrink job: Overheating creates flats. Use sweeping heat, rotating the cord. If it’s too lumpy, cut off and replace the sleeve; don’t fight it.
- Wrong bead count: For miles instead of kilometers, use 5 upper beads. The build stays the same; only your tracking convention changes.
Built well, this tool is quiet, glove‑friendly, and durable—good stewardship of your time and materials, and a simple thing you can make for your team or youth group. Next, we’ll tune friction and spacing in the field so your beads stay honest after miles of brush, rain, and grit.
Lock‑In Anti‑Slip: Heat‑Shrink Techniques, Constrictor Knots, and Micro‑Whipping
A wet ruck, numb fingers, and beads that won’t stay put—that’s when you realize friction isn’t optional. The good news: with a lighter, a few inches of tubing, and some thin cordage, you can “lock in” your pace beads so they move when you want them to, and never when you don’t. Stewardship is often about tending to the small things; these micro‑upgrades keep the rest of your land nav clean and trustworthy.
Heat‑Shrink Friction Collars
Why: Polyolefin heat‑shrink creates low‑profile detents that add predictable friction without bulky knots. It works in mud, rain, and with gloves.
How:
– Cord sizes: gutted 550 (~3–3.5 mm once flattened), 275, or 1.8 mm microcord.
– Tubing: 2:1 or 3:1 shrink ratio. For gutted 550, use 3/16 in (4.8 mm); for 275/microcord, 1/8 in (3.2 mm).
– Cut 5–7 mm segments. Slide onto the “track” where beads ride, or place just above/below bead banks as stops.
– Heat with a lighter held 4–6 in away, constantly moving. Rotate the cord; pinch gently with a gloved thumb while warm to form a subtle ridge.
Tips:
– 3:1 conforms better and grips the sheath; 2:1 is tougher but may need a scuff with 400‑grit sandpaper for extra bite.
– Avoid adhesive‑lined tubing—it can gum up in heat and attract grit.
– If beads jam, trim the collar with a razor or lightly sand; if they still slip, add a second collar 2–3 mm away for a “gate.”
Constrictor Knot Stoppers
Why: Constrictors bite harder under load and stay put. Ideal for creating low‑bulk, movable stops.
How:
– Tie a constrictor around the main cord using 0.8–1.2 mm line (bank line #18, waxed linen, or microcord). Two wraps crossing under, ends tucked.
– Seat it with pliers and dress tightly. Position just below your “tens” bead bank or between banks as needed.
– Optional: touch of beeswax to weatherproof. Avoid superglue unless you’re done tuning.
Common mistake: using thick cord for the constrictor; it creates a lump that snags beads. Keep it thin and neat.
Micro‑Whipping Texture Bands
Why: Short whipping adds grippy micro‑texture without bulk. Great along the travel path for consistent “feel.”
How:
– Use waxed whipping twine or dental floss. Lay a 2 in loop, make 8–10 tight wraps over the standing part to form a 2–3 mm band, tuck the tag through the loop, and pull the standing end to bury it.
– Burnish with beeswax. Place bands 8–10 mm apart to create tactile “clicks.”
Troubleshooting: If wraps loosen when wet, you either under‑tensioned the turns or skipped wax. Rewrap tighter and wax.
Key takeaways: Heat‑shrink gives durable detents; constrictors make precise, movable stops; micro‑whipping adds uniform texture. Combine as needed for your environment. Next, we’ll tune spacing and tension so your beads match your stride and survive real‑world abuse.
Field Tuning and Calibration: Adjusting for Terrain, Load, Weather, and Gloves
Field Tuning and Calibration: Adjusting for Terrain, Load, Weather, and Gloves
Picture this: you’ve got 1.6 km to cover on a bearing, the ridgeline rolls, the brush grabs at your knees, and you’re carrying 40 lb with winter gloves on. Your “flat, unladen” pace count won’t survive first contact. Field tuning is about honoring reality—adapting your beads and your baseline so distance stays honest when the world gets messy.
Quick Calibration Drill (2–5 Minutes)
- Find a 100 m stretch that matches your next leg (same slope, surface, and load). If you don’t have a marked line, pace off 100 m using a measured map segment and a known landmark.
- Walk it twice, counting single paces (every left foot = 1). Average the two runs. Do a third if your numbers differ by more than 3 paces.
- Set your “per-100 m” count for that leg. Example: baseline 64 paces/100 m on flat, but today’s mixed brush and 40 lb gives you 72—use 72 for the next leg set.
Why it works: stride length compresses under load, slope, and surface drag. A quick, localized calibration stewards your time and energy better than guessing.
Adjustment Heuristics When You Can’t Calibrate
- Load: +5–10% for 35–50 lb, +12–15% for 60 lb+.
- Terrain: +8–15% in soft sand, snow crust, or mud; +5–10% in knee-to-hip brush; talus adds variability—calibrate if possible.
- Slope: +5–12% uphill; gentle downhill can be -2–5%, but steep down often becomes +5–10% due to braking steps.
- Night/low vis: +3–8%.
Stack conservatively. If baseline is 64, a 40 lb ruck (+8%) and light brush (+6%) suggests 64 x 1.14 ≈ 73 paces/100 m.
Gloves, Wet Cord, and Bead Tuning
- Glove gap: set bead spacing to 6–8 mm so you can slide one bead per 100 m without fumbling. For bare hands, 3–5 mm is fine.
- If beads slip when wet: add a 5–8 mm band of adhesive-lined heat-shrink just above the bead bank to increase drag, or tie a temporary overhand “stop” knot below the bank.
- If beads are too tight for cold hands: gently warm the heat-shrink collar (cupped hands or brief pass beside—not in—a flame) and roll it with a carabiner to loosen. Avoid direct flame contact; scorched shrink loses grip later.
- Marking: a tiny paint dot every 5 beads helps gloved counting by feel and glance.
Common Mistakes and Fixes
- Using flat-ground counts everywhere: recalibrate per leg or apply factors.
- Double-counting with gloves: stick to single paces. If you switch, re-baseline immediately.
- Not re-zeroing after halts: slide all beads back before moving; make it a habit at every checkpoint.
- Ignoring fatigue: if your 100 m checks drift by >3 paces, refresh the average.
Key takeaway: be faithful in the small adjustments. A two-minute calibration and a bit of friction tuning keep your beads—and your navigation—truthful when conditions change. Next, we’ll cover quick field repairs and long-term maintenance so your set stays mission-ready.
Hard Use and Upkeep: Troubleshooting, Repairs, and Integrating Beads into Your Nav Kit
A week into a wet, brushy trek, your beads look like they went through a tumbler: gritty, a couple heat-shrink segments scuffed, and one bead sliding when you jog downhill. This is where durability and smart upkeep keep your nav rhythm intact.
Field Troubleshooting: Slips, Stiffness, and Snags
- Slipping beads: Wipe mud/oil off the cord first; contamination is the usual culprit. If a bead still creeps, lightly rough up the cord under that bead with 220–320 grit sandpaper, then re-shrink just that section with controlled heat (steam from a kettle or the “back-of-flame” on a lighter). If your original tubing was 2:1 and feels loose, upgrade the problem bead to 3:1 or adhesive-lined heat-shrink for more grip.
- Stiff movement in cold: Heat-shrink and paracord stiffen below freezing. Oversize to 8–10 mm beads, and leave 0.5–1.0 mm more gap in shrinked segments during the build to preserve winter glide. A dusting of climbing chalk on the cord (not oil) restores smooth, quiet movement without creating slip.
- Tangling and snagging: Mount the strand so the lowest bead sits about 2–3 inches above your sternum, with total hang length 8–9 inches. Route the top loop under a webbing run and add a weak-link (20–30 lb thread or a ranger band) as a breakaway for safety.
Quick Repairs that Last
- Frayed cord or cut sheath: Tie a short 2 mm accessory cord section in with a double fisherman’s or sheet bend as a temporary splice; whip the splice with dental floss and seal with a tiny strip of heat-shrink or tape. Replace the whole cord at first long halt.
- Heat-shrink split: Slide a 10–12 mm sleeve over the affected bead and shrink gently. Adhesive-lined tubing buys weeks; standard buys days.
- Lost bead: A 9 mm airsoft BB, a trimmed pen cap segment, or a split shotgun shell spacer can stand in; secure with a 6–8 mm shrink collar.
Integrating with Your Nav Kit
- Placement: Larks-head onto your left shoulder strap or map case spine for easy right-hand manipulation. Keep it clear of sternum strap buckles.
- Coordination: Pair with a wrist compass, leg card (pace-per-100 m by terrain), and a map case pencil to tally legs. Every fifth or tenth bead should have a tactile marker (knurl, square bead, or doubled shrink) for night counting without light.
- Noise discipline: Add 5–7 mm shrink “bumpers” between beads or a ranger band wrap at the base to stop rattle.
Stewardship shows in the small habits: rinse grit, inspect after each leg, and share a spare set with a teammate. Keep the tools faithful, and they’ll keep you honest in the dark. Key takeaway: clean, inspect, and integrate with intent; most failures are preventable with minutes of care and a couple inches of heat-shrink.
Slipping beads aren’t a mystery; they’re a friction problem you can engineer away. Build for control, not hope: match bead bore to cord diameter, add predictable grip with heat‑shrink landing pads, and backstop everything with a mechanical lock—constrictor knots or micro‑whipping that won’t creep when wet, cold, or muddy. Then prove the system under load and gloves until each bead moves only when you intend. That’s the difference between a gadget and a tool you trust at mile six, in the rain, at night.
Action steps to finish strong:
– Gather: quality paracord that fills your bead bores, heat‑shrink that shrinks snug without flattening the cord, a few inches of micro‑cord, and a lighter. Bring a spare set to the bench.
– Build one clean prototype: consistent bead spacing you can read by feel, heat‑shrink “stops” placed where your thumb lands, and a positive lock at each end.
– Field tune: verify your pace on flat, then again with your real ruck, terrain, and gloves. Adjust bead travel and stops until your count matches reality.
– Harden the kit: stash a tiny repair sleeve and 12–18 inches of micro‑cord in your nav pouch; integrate the beads on a shoulder strap or compass lanyard with a pace card and pencil.
Preparedness is faithful stewardship of what you can control before the weather turns. Build once, test twice, and carry a set you can bank on. Your future, tired self—and your team—will thank you when the path gets ugly and the only light is the one you brought.