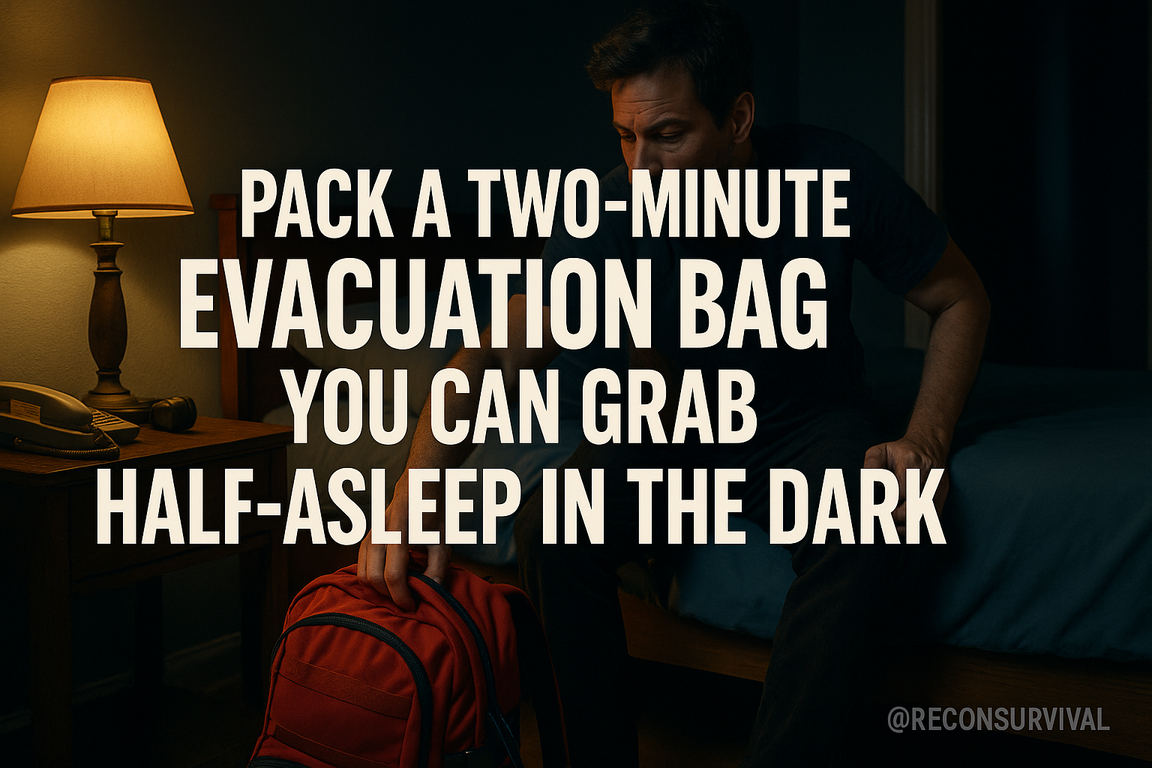
At 2:13 a.m., the smoke alarm goes staccato and the hallway strobes with cheap LED. Your brain is molasses, your feet find the cold floor, and everything you “meant to grab” turns into a mental blur: wallet? meds? kids’ inhaler? the dog’s leash? By the time the smell of hot plastic hits, you’ve already burned your first twenty seconds deciding what matters. The National Fire Protection Association notes you may have under two minutes to get out. That’s not a figure of speech. It’s a timer.
I write evacuation plans for crews who don’t get do-overs. Over the past decade—wildfire seasons that rewrote maps, 3 a.m. gas leaks, and hurricane nights where the grid vanished—I’ve learned that the difference between chaos and control is a bag you can grab half-asleep in the dark, with contents organized so your hands know where your eyes don’t need to look.
This guide will show you how to build that two-minute bag—what goes in, where it lives, and how it’s laid out for speed under stress. We’ll cover the non-negotiables (ID and docs, cash, meds, comms, light, water, clothing), the smart extras (chargers that actually work, pet kit, kid comfort), and the layout so nothing is “somewhere” in a sack. You’ll get tactile packing strategies, battery and lighting choices that won’t fail when you do, and a blueprint for staging, rehearsing, and maintaining it in fifteen-minute blocks. We’ll also troubleshoot the real-world snags—glasses wearers, high-rise dwellers, multi-vehicle families, night-shift schedules—and the common mistakes that waste seconds you don’t have.
By the end, you’ll have a bag that answers a terrifying question with muscle memory. When the alarm sounds, you won’t negotiate with fate—you’ll shoulder, step, and go.
Build for the First 24 Hours: Threats, Timelines, and the Two-Minute Rule
You wake to the sharp smell of smoke and pounding on your door. Power’s out, hallway alarms are screaming, and you’re not fully awake. This is the moment your bag either buys you time—or gets you killed. The first 24 hours after an evacuation are about stabilizing the basics: getting out fast, staying functional, and buying options while the situation clarifies. Build for that window, not for the apocalypse.
Why “First 24” Wins
In real incidents—wildfires jumping a road, an apartment fire, a gas leak, a chemical spill—the critical period is short and chaotic. You don’t need a week’s worth of gear on your back; you need immediate capability. Think “micro-missions” for a single day:
– Light: headlamp on the bag handle and a backup AAA in a taped pair.
– Comms: phone + 10,000 mAh battery bank and short cable.
– ID and access: copies of IDs, insurance, a key set, $100 in small bills.
– Air and water: 2 N95s and 1 liter of sealed water or a flat pack bottle.
– Meds and essentials: 24–72 hours of prescriptions, glasses, and a charger for hearing aids.
– Warmth and cover: compact shell or poncho, hat, thin gloves.
Keep the weight under 10–15 lb. You’re moving through stairs, smoke, or rain—not hiking a ridge line. The why is simple: heavy bags slow decision-making, snag in narrow exits, and exhaust you faster than stress already will.
Threats and Timelines
Map your local “threat clocks.” Some hazards give seconds to minutes (house fire, tornado in sight), others give 5–30 minutes (wildfire spot warning, police knock for gas leak), and a few allow hours (rising river, planned grid shutdown). Your bag must cover the immediate tier—self-rescue and short-term independence—so you can get to a car, a neighbor’s porch, or a shelter with dignity and options.
Actionable setup:
– Stage the bag within arm’s reach of your exit, handle facing out, at knee height.
– Add tactile landmarks: paracord pull on the main zipper, 1-inch glow tape on handle.
– Store shoes, a hard key, and a jacket in the same “exit triangle” within 3 feet.
The Two-Minute Rule in Practice
From eyes-open to feet out the door, you get 120 seconds. Practice it. Set a timer, kill the lights, and try it twice a month. You’ll quickly discover snags: a buried bag, missing keys, or a dead headlamp. Fix them immediately.
Common mistakes:
– Overpacking a 72-hour “everything bag” that you never grab.
– Stashing the bag behind sports gear or suitcases.
– Relying on power for garage doors or elevators—always plan a stair/door alternate.
– Forgetting pet needs: spare leash and a collapsible bowl weigh almost nothing.
Key takeaway: Build lean for the first day, stage for darkness, and enforce the two-minute rule. In the next section, we’ll translate these principles into a simple kit layout you can navigate by touch.
Design the Bag for the Dark: Layout, Labeling, and Muscle Memory
At 2:11 a.m., the power snaps off and the townhouse hallway fills with smoke. You’re barefoot, coughing, and the only light is the dull glow from a distant streetlamp. In that moment you don’t “look” for anything—you feel for it. Design your two-minute bag so your hands can navigate it faster than your eyes.
Build a Layout You Can Read With Your Hands
Start with orientation. Add a rigid, textured strip (2 inches of stair tread tape) across the top handle; that’s “north.” Always store the bag north-up by the door so you can grab it the same way, every time. Inside, organize by a clock-face: 12 o’clock is ID/keys/phones, 3 o’clock is light, 6 o’clock is water/face covering, 9 o’clock is med/bleed kit. Use distinct pouch textures to separate categories—mesh for admin, ripstop for first aid, smooth nylon for electronics. Avoid identical pouches.
Code your zippers. Tie paracord pulls of different lengths and knot counts: one knot (1-inch tail) = light, two knots (2-inch tail) = admin, three knots (3-inch tail) = medical. Add heat-shrink tubing or ranger bands to make them grippy. Dummy-cord critical items (headlamp, keys, inhaler) with 12–18 inch micro-cord so they can’t vanish into the dark or into a storm drain.
Labeling That Works Without Light
Printed labels are useless at 3 a.m. Use tactile markers: a dab of clear epoxy or puff paint to make raised dots on bottles and caps (one dot = pain relief, three dots = antihistamine), and a strip of hook-side Velcro on the med pouch flap so it “scrapes” differently under your fingers. Add a 1×1-inch glow-in-the-dark tape tile to the headlamp pouch and to the bag handle—enough to find, not enough to give away your position. Avoid black-on-black—choose high-contrast interiors (gray or blaze orange) to amplify dim light.
Train the Muscle Memory
Placement only works if your brain knows it. Run monthly dark drills: from bed to headlamp in under 10 seconds; to med kit in under 20. Practice one-handed retrieval while holding a doorknob or child. Repack identically after every use—no “temporary” placements. Time yourself; if a zipper snags, you’ve overstuffed or chosen the wrong pouch size (4×6 inches is ideal for admin; 5×8 for med).
Common mistakes: reorganizing after a trip and not retraining, relying solely on glow labels, twist-off lids you can’t open under stress, and “mystery pockets” that feel identical.
Key takeaway: design for touch, not sight—fixed orientation, tactile codes, and reps until your hands know the route. Next, we’ll stock the quick-grab tier so your first 60 seconds are automatic.
The Critical Modules You’ll Reach First: ID & Cash, Comms & Power, Med, Water & Calories, Shelter & Clothing
You wake to the smell of smoke and the tinnitus of a distant siren. Lights are out. No glasses, no time. Your hand finds the grab bag by the door, and the first pouches you pull are the ones that turn chaos into options. Pack these modules where you can reach them in the dark, by feel, and build them to work even if nothing else does.
ID & Cash
Why first: identity opens checkpoints, and cash buys options when networks are down. How: in a bright, waterproof pouch, keep a passport, driver’s license copy, insurance card, and a single laminated sheet with your name, DOB, blood type (if known), allergies, medications, and two emergency contacts. Add a USB drive with encrypted scans of key documents and a spare house/car key. Money: $200–$300 split into $1s, $5s, $10s, and a few $20s, plus $5 in quarters. Troubleshoot: rotate the doc sheet when addresses change; test-decrypt the USB annually. Common mistake: carrying only plastic—ATMs, card readers, and power grids fail together.
Comms & Power
Why first: information buys time, and charged batteries buy information. How: 10,000–20,000 mAh power bank (lithium, 18W PD if possible), braided USB-C, Lightning, and micro-USB leads, dual-port wall charger (2.4A+), and a 12V car adapter. Add a pocket AM/FM/NOAA radio or micro hand-crank set, SIM tool, and a prepaid SIM or calling card. Include a loud whistle and a mini notepad with a Sharpie for when voice comms fail. Troubleshoot: set a monthly reminder to top the power bank to 80–100%. Common mistake: wrong cables or dead bank—test quarterly.
Med
Why first: you can’t outthink blood loss. How: a compact trauma-forward kit—CAT or SOFTT-W tourniquet, 4″ pressure bandage, hemostatic gauze (e.g., QuikClot), compressed gauze, nitrile gloves, mini shears, tape. Add meds: ibuprofen, cetirizine, loperamide, electrolyte tabs, and your personal prescriptions (24–48 hours), plus blister care. Troubleshoot: replace meds every 6–12 months; practice TQ application one-handed. Common mistake: stuffing a “boo-boo kit” but omitting a tourniquet.
Water & Calories
Why first: you run on water and sugar—not optimism. How: one rigid 1 L bottle (full) or two 500 ml to split weight. Add a Sawyer Mini with a 1 L squeeze bag and 6–10 purification tablets. Calories: 600–1,000 kcal of heat-stable food—vac-sealed nuts, jerky, and two high-calorie bars. Include 2–3 electrolyte packets. Troubleshoot: in freezing climates, keep the bottle in an insulated sleeve; rotate food every six months. Common mistake: sticky gels that melt and leak into gear.
Shelter & Clothing
Why first: microclimate buys endurance. How: vacuum-compressed synthetic midlayer, beanie, liner gloves, and one pair wool socks (no cotton). Add a mylar bivy (warmer than a blanket), a lightweight poncho, and a headlamp with lithium batteries (AAA or 18650) and a spare set. Troubleshoot: check headlamp lockout to prevent pocket activation; try on gloves with the tourniquet. Common mistake: bulky cotton hoodies that trap moisture and chill you.
Key takeaway: these modules are your day-one lifelines—fast, tactile, and redundant. Stage them on top, color- or texture-coded, and practice grabbing them in the dark. Next, we’ll arrange the rest of the bag so the right tool is always under your hand.
Night-Proof Gear Choices: One-Handed Operation, No-Light Navigation, and Redundant Fail-Safes
You wake to the smoke alarm at 2:13 a.m. The room is black, your hands are clumsy, and time feels elastic—too slow and far too fast. This is where night-proof gear earns its keep: when you can’t see, can barely think, and need everything to work the first time.
One-Handed, Half-Asleep Operation
Favor gear you can deploy with one hand and minimal dexterity. Replace tiny zipper tabs with 3–4 inch paracord pulls (gutted 550 cord is flatter and quieter) and add 3 mm shock-cord loops to major toggles so you can hook and pull with a finger. Choose buckles you can find and open without looking; magnetic slide buckles (e.g., Fidlock-style) on the sternum strap are easier than side-release clips when your hands are numb.
Lighting is non-negotiable: carry a headlamp with a prominent single-mode button you can locate by feel, physical lockout (quarter-turn tailcap or long-press lock), and a low-output mode (1–5 lumens) that won’t nuke your night vision. A 18650 cell (3,000–3,500 mAh) keeps runtime measured in days, not hours. Add a backup clip light on AAA or a USB-C rechargeable button light tethered to the bag.
Fire and tools matter too. A standard Bic lighter is truly one-handed; stash a second, and consider a one-handed sparker like a Sparklite (0.6 oz) as a redundancy. Choose a folding knife with an oversized thumb hole or tab and a strong detent you can index by feel. Gloves? Go for thin, grippy liners you can don one-handed; they beat bulky work gloves at 2 a.m.
Common mistakes: tiny zipper pulls, two-handed buckles, multi-mode lights with confusing UIs, and lighters buried under gear. Troubleshoot by doing a blind test: with gloves on, start a timer, put the bag at your feet, and try to retrieve light, keys, and mask in 30 seconds.
No-Light Navigation: Tactile Indexing
Build a tactile “map” of your bag so you can find anything in absolute darkness. Standardize pocket locations and label them by touch, not color. Use knot codes on zipper pulls—one overhand knot for medical, two for fire, three for comms. Add different textures: ranger bands (cut inner tube) on critical zips, a strip of hook Velcro on the med pouch, smooth heat-shrink tubing on the tool pocket. Stick raised markers (Velcro dots or epoxy bumps) on your headlamp’s switch and power bank’s USB-C port so you never have to hunt.
For orientation, put a single tritium or photoluminescent fob on the grab handle—visible only up close, preserving light discipline but making the handle “alive” to sleepy eyes. Mark the right shoulder strap with a large knot or rubber ring so you don’t don the pack backward under stress.
Avoid glow-everything; photoluminescent tape bleeds light in dark rooms and can give away position. Rely on touch first, low light second. Keep cords and lanyards short (under 4 inches) to prevent snagging, and anchor essentials—keys, micro-light, ID pouch—on retractable or short dummy cords to the bag’s frame.
Redundant Fail-Safes That Don’t Add Bulk
Redundancy isn’t duplication; it’s dissimilar backups that fail differently. Two lights: a main headlamp plus a button light on a zipper pull, plus a single red chem light (6-inch, 8–12 hour) for hands-free area marking. Two closures: the main zipper plus a compression strap that can hold the bag shut if the zipper blows. Two power paths: a 5,000–10,000 mAh USB-C power bank and a cable secured with a ranger band, plus a spare USB-C-to-USB-A adapter taped to the cable. Two fire sources: Bic lighter and one-handed sparker. Two water barriers: electronics in an inner roll-top drybag or Aloksak inside the pack; if the outer gets soaked, the inner rides dry.
Backups for navigation and access: spare house and vehicle keys on a stainless split ring tethered inside the top pocket; paper contact list laminated (index card size), even if your phone dies. Extra eyeglasses in a crush-resistant case—vision is a single point of failure most people forget.
Pitfalls: carrying two of the same failure mode (two AAA lights, both dead), unsecured spares that migrate to the bottom, and magnetic buckles stored against magnetic-stripe cards. Rotate batteries on your birthday and set a calendar reminder. Do a quarterly dark drill to confirm your system still works.
Key takeaways: choose gear you can run with one hand, index your bag by touch, and build dissimilar redundancies that keep you moving even when one piece fails. Next, we’ll lay out the bag so those night-proof choices fall naturally to hand under pressure.
Run the Two-Minute Drill: Staging, Door Kits, Pet/Child Add-Ons, and Night Rehearsals
It’s 2:17 a.m. The alarm is sharp, smoke is low, and your brain is foggy. This is not the time to hunt for shoes or a leash. Your two-minute bag only works if you can reach it, attach what you need, and move—half-asleep and in the dark. The drill is where planning turns into muscle memory.
Stage Like a Firefighter
Stage the bag where your hands naturally go when you stand: waist height, within one step of your bedroom exit. A 40–48-inch-high wall hook (3M 10–15 lb Command hook or lag screw into a stud) keeps the bag off the floor and easy to grab without bending. Add a 2-inch strip of glow-in-the-dark or reflective tape on the strap so you can find it with a headlamp sweep. Clip a small headlamp to the shoulder strap and keep hard-soled slip-ons directly under the bag, heels against the wall, toes pointed out. Why here? You’re reducing decision points and movement under stress; every reach and bend costs seconds.
Redundancy matters: if you sleep on a different level than your main exit, stage a second, lighter “satellite” bag (5–7 lbs) near that exit. Keep the full bag 10–15 lbs; heavier invites fatigue and abandonment. Common mistakes: moving the bag “just for now,” burying it behind coats, or letting it become a junk hook. Mark its parking spot with tape; if it’s empty, you’ll notice.
Build a Door Kit That Lives on the Knob
Hang a small, rip-away pouch on the inside doorknob with Velcro One-Wrap. Target 6–12 ounces, max 1 lb. Pack universal items you’d want even if you can’t reach the main bag: spare keys and car fob, flat-pack N95s (2), nitrile gloves (2), slim power bank (5,000 mAh), cord, spare glasses, whistle, Sharpie, mini chem light, and a laminated “who/where” card. Add a door wedge—if you need to block a self-closing hall door. The why: doors are fixed touchpoints; you’re guaranteed to pass it.
Troubleshooting: avoid zipper forests—one simple pouch, one pull. Replace coin-cell-lit fobs yearly; chem lights expire—date them. If you have multiple exits, clone the door kit at each.
Pet/Child Add-Ons You Can Attach Blindfolded
Pre-rig pet gear to a dedicated carabiner on the bag: a slip lead, harness sized and adjusted, ID tag, and a thumb-sized treat pouch for compliance. A collapsible bowl (under 1 oz) nests over a 1-liter water bottle in your side pocket. For cats, keep a soft-sided carrier staged open near the bedroom and a pillowcase as a backup containment tool—fast, humane, proven.
For infants/toddlers, mount a soft carrier (wrap or buckle, pre-adjusted) on a separate hook under the bag. Add a diaper pod: 3 diapers, 10 wipes in a zip bag, small blanket, spare pacifier on a tether, and child ear protection (NRR 25–30). Hands-free is non-negotiable when navigating stairs or smoke. Color-code add-ons (green for pet, yellow for child) with reflective tabs so you can grab the right module without thinking.
Common mistakes: relying on retractable leashes, which tangle in chaos; storing pet meds loose; not adjusting the child carrier to the primary evacuator’s torso. Refit quarterly and after growth spurts.
Rehearse in the Dark
Run the two-minute drill quarterly. Start in bed, lights off. Hit the alarm, put on shoes, grab the bag and door kit, attach pet/child modules, and exit to the vehicle. Use only your staged headlamp. Time it. Goal: consistent sub-90 seconds for a single adult, sub-120 with dependents. Note friction points: snagging straps, noisy zippers that wake the whole house, a pet that hesitates at thresholds. Fix them: tape loose webbing, wax sticky zippers, train a “mat” cue by the door.
Rotate who leads the drill; everyone should know the choreography. Reset immediately—recharge the power bank, replace used wipes, rehang the carrier. Key takeaway: eliminate decisions, make the path tactile and obvious, and practice until the sequence is boring. Next, we’ll lock in maintenance rhythms so your setup works exactly the same on the worst night of the year as it did today.
Keep It Ready on Autopilot: Rotation Schedules, Battery Strategy, and Seasonal Swaps
At 2:11 a.m., the power dies and the sky is orange. You’re half-dressed, half-awake, and fully out of time. Whether your bag earns its keep in that moment comes down to what you did in the quiet weeks before: automate the upkeep so your gear stays ready without thinking.
Build a Simple Rotation Rhythm
Readiness decays. Batteries self-discharge, meds expire, snacks turn to dust. Put your bag on a calendar so entropy doesn’t win.
- Monthly (2 minutes): Touch the bag. Check the external tag where you recorded last inspection and next dates. Squeeze water containers to confirm they’re still full and not frozen or bulging. Glance at meds and snacks for expiry. Do a 10-second light test: headlamp, flashlight, and power bank LEDs.
- Quarterly (15 minutes): Top off the power bank to 80–100%, cycle radios, and verify cable fit on your current phone. Replace snacks (eat the old ones), restock cash, and update copies of ID/insurance. Use painter’s tape on anything with a date: “Repack 2026-06.” Snap a photo of the contents for a quick visual inventory.
- Seasonal (10 minutes): Swap clothing layers, sunscreen/bug dope, and hand warmers. Adjust water strategy for temperature (more below).
- Annual (30 minutes): Full teardown. Check seals, gaskets, straps, and zippers. Replace glow-sticks and chem warmers. Weigh the bag; if it drifted heavier, prune.
Why this works: small, scheduled touches prevent big, rare overhauls you’ll procrastinate. Tip: tie checks to recurring life events—first weekend of each season; daylight saving time; mortgage/rent day.
Common mistakes: letting “someday” slip six months; no dates on anything; changing phones and forgetting the cable; storing the bag in a hot garage that cooks meds and batteries.
Battery Strategy That Survives Heat, Cold, and Panic
Choose cells that won’t leak, and standardize across devices.
- Use primary lithium AA/AAA (e.g., Energizer Ultimate Lithium) for headlamps/radios: 20-year shelf life, leak-resistant, work from -40 to 140°F. Carry 8x AA and 6x AAA in a plastic caddy. Avoid alkalines; they leak and die in cold.
- If you run 18650/CR123A lights, store protected cells in cases; tape 9V terminals; never loose in the bag. Label “Rotate 2027-12.”
- Power bank: 10,000–20,000 mAh with USB-C PD. Store at ~50% charge; top off every 90 days. Include USB-C to C, USB-A to C, and a short Lightning or micro-USB adapter as needed, plus a 12V car charger (18–30W) for evacuations by vehicle.
- Don’t mix old/new batteries in a device; cold night? Warm cells in a pocket for a minute before use. Lock out headlamps (hold button 3s) to prevent pocket activation.
Red flags: swollen power bank (replace), corrosion in battery tubes (clean and retire if pitted), unknown-age cells (discard or relegate to noncritical tasks).
Seasonal Swaps That Matter
A two-minute bag should flex with weather and where it lives.
- Winter: Add a thin merino top, fleece beanie, liner gloves, neck gaiter, and 4–6 chemical hand warmers. Upgrade to an emergency bivy rated for sub-freezing. Water: use a wide-mouth insulated bottle; leave 10% headspace for ice; keep the bottle inside the bag’s core to reduce freeze risk. Lithium cells shine in the cold—lean on them.
- Summer: Swap in a breathable long-sleeve, brimmed cap, SPF 30+ sunscreen, lip balm with SPF, and Picaridin wipes. Add 8–12 electrolyte packets. Water: soft bottles or a 1L hard bottle; check for plastic taste as temps climb.
- Food and meds: Choose items with long shelf lives (Datrex or SOS bars; vacuum-sealed nuts; blister-packed OTCs). Rotate every 6 months; set a reminder. If you carry prescriptions, store a small backup with your name and dose; replace per your pharmacist’s guidance.
- Vehicles vs. indoors: If your bag lives in a car, heat kills. Use only primary lithium cells, heat-stable snacks, and store meds indoors on a mirrored kit you can throw in.
Key takeaways: automate small, frequent checks; standardize batteries and cables; use lithium primaries; and make seasonal swaps deliberate. Do that, and your bag stops being a guess—and becomes a promise you can keep at 2 a.m.
When the alarm shreds the silence at 2:13 a.m. and your world tilts toward chaos, you won’t have time to negotiate with clutter, dead batteries, or missing wallets. That’s why you built for the first 24 hours, designed for the dark, and chose gear that works one-handed without light. You prioritized the modules you reach first—ID and cash, comms and power, med, water and calories, shelter and clothing—and you put redundancy where failure hurts most. The final piece is making it all reflex: two minutes, half-asleep, out the door with what matters.
Do this next—tonight if you can:
– Stage the bag within two steps of the bed, straps up, pathway clear. Hang the door kit (keys, contact card, small cash) where your hand naturally lands.
– Pack the core modules tight and tactile: ID/cash in a zip pouch; phone cable + wall plug + 10,000 mAh bank; bleeding control + personal meds; 1 L bottle + simple purifiers; socks, shell, hat, gloves. Photograph the layout.
– Mark for the dark: raised labels or cord knots on zippers; headlamp set to red with lockout; spare batteries taped in pairs.
– Run a two-minute drill in the dark this week. Note snags, fix them, repeat until smooth.
– Put readiness on autopilot: first-of-month battery top-off, quarterly food/water rotation, spring/fall clothing swaps. Add pet/child modules to the door kit and rehearse with them.
When minutes matter, preparation buys calm. Build it once, maintain it lightly, and trust that sleepy you can still make the smart exit.